

Calculating correct weight distribution in containers

 Growing up in the Netherlands, one of the greatest excitements was ice skating on our many rivers and canals. Unfortunately there could be years without any ice, as our winters are often too mild. If it does get cold enough, the ice usually only lasts for a few days and it is not always strong enough to skate on. But if there is….everyone will be on the ice, young and old, and we only have one thing on our minds “will this be the year…”.
As soon as the temps drop below 0, the only thing we can talk about is the possibility of an “The 11 Stedentocht (the 11 cities ice skate race)”. This race is 200 km long, connecting 11 cities via frozen canals, streams and rivers. In order for “The 11 Stedentocht” to take place, we need a very long period of a “deep freeze”. This tour of all tours is only organized when the natural ice along the entire course is at least 15 centimetres thick so that it can carry the heavy load of the tens of thousands of people on the ice. In other words… when the foundation is strong enough. It is a rarity for the ice in our country to get this thick and we have only had 14 of these events so far. The first one in 1909 and the last one in 1997.
 Facing danger of falling through the ice on a whole other level are the truckdrivers on the ice roads in Canada and Alaska. When their trucks are loaded too heavy and/or the cargo has not been distributed correctly over the axles of the truck, it just means the end of the truck and the cargo when the ice breaks.
So what do ice skating, trucks on ice and securing cargo in shipping containers have in common? They all require a strong foundation with proper weight distribution!
Weight distribution in shipping containers


A cargo container is designed to carry cargo. Most of us see a container as an extremely strong steel box designed to carry weights of over 20 tons. Why should we worry about where or how we place the cargo on the floor?
Probably the reason is simply that we generally never see the underside of a container, which consists of pieces of plywood screwed on to a number of cross members down the length of the container. In between the cross members it’s only plywood, which is not strong at all and the floor is therefore not designed for heavy selective loads.
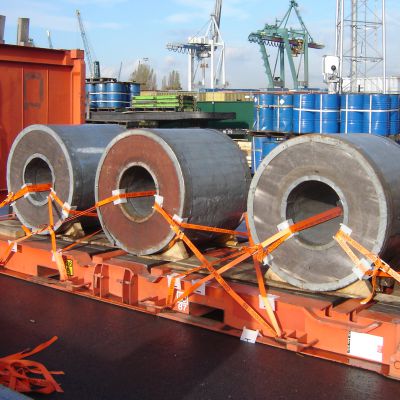
The container may have a maximum payload of e.g. 28 tons but this is based on being spread over the entire area of the container floor! This is easy to accomplish with light weight palletised loads. Yet, for cargos with a large mass concentrated in a small area like steel coils or heavy machinery, it is extremely important to first ask the question whether the container floor will be able to withstand this concentrated weight without e.g. timber supports on the floor.
Cargo weight should be evenly distributed over the entire length of the container floor
- a 20ft container floor, build accordingly ISO 668 standard, may be loaded with 4.5 ton/meter
- a 40ft container floor, build accordingly ISO 668 standard, may be loaded with 3 ton/meter
If the ballast exceeds these numbers per meter, more beams should be placed lengthwise. These beams cannot stick out from underneath both sides of the cargo by more than 1 meter. If this still is not sufficient you need to find other means of transportation, e.g. a flat rack.


When driving a forklift inside a container you should not exceed the maximum floor ballast. According ISO standard 1496/1. a forklift can drive inside a cargo container if:
• the weight of the front axle (forklift including load) does not exceed 5.460 kg
• the contact surface meets a minimum of 142cm² per tire
• the minimum width of the tires is 18 cm
• the distance between the wheels on 1 axle is 76 cm
Simple trick for calculating floor support
Here is a simple trick to calculate floor support/weight distribution when you are working in the field if floor support is required.
1. Count the number of rows of screws (see picture) from back to front in the container floor e.g. 18 rows for this 20’ container

2. The number of rows of screws in the container floor will tell you the number of container cross members under the plywood floor e.g. in this example 18
3. Divide the max. payload of the container by the number of rows of screws. This provides the max weight that one cross member can carry i.e. in this example 28 ÷ 18 = 1.56 tons
4. If your cargo is a steel coil of 5 tons it must be spread over at least 5 ÷ 1.56 = 3.2 or, rounded up, 4 cross members
5. This will require the coil being bedded on timber beams that spread the load along these 4 container cross members
“Cracking ice does not break”
There is a saying that cracking ice does not break. However…when the ice starts to crack, the breaking point is very close. Please be careful that your cargo “doesn’t fall through the ice” and make sure your cargo weight is correctly distributed on the loading floor.
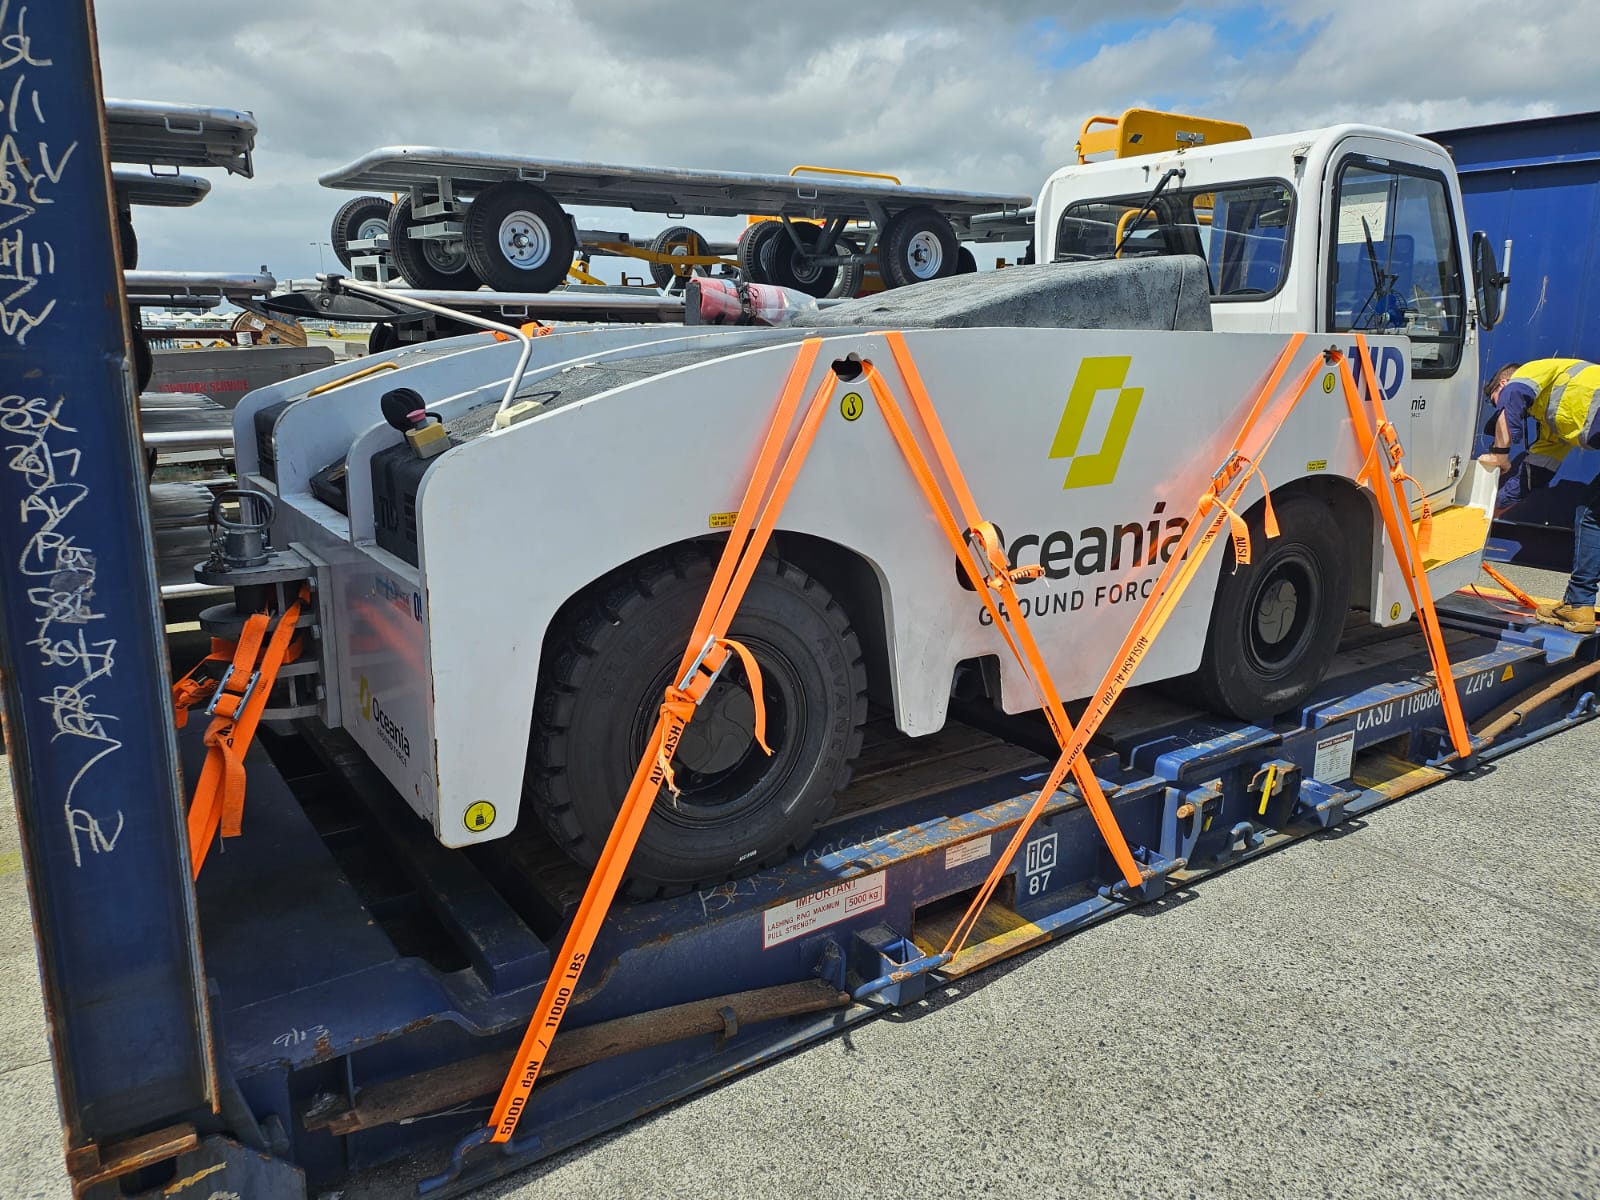
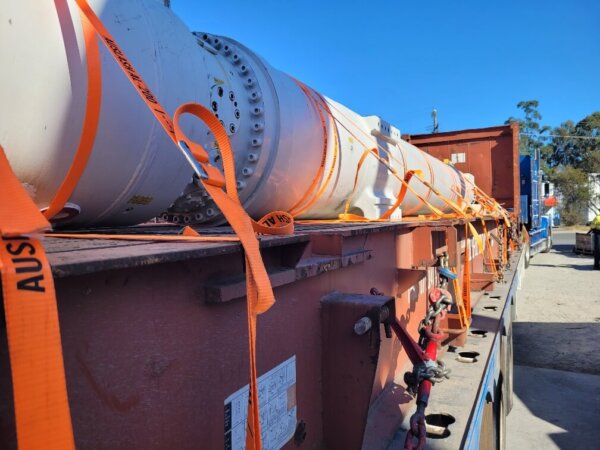
Don’t forget to secure and/or block and brace your cargo
Of course, securing your cargo against movement is also key to successful, damage free transport. We offer a wide variety of container securing solutions, including our Cordstrap composite lashing and dunnage bags. These are globally the most commonly used products to safely secure cargo of any weight, size and dimensions. All our container securing solutions are CTU Code Compliant, AAR approved and DNV/GL Certified. Our team will be happy to meet with you for an onsite demonstration; and ofcourse we are always happy to assist with complimentary 3D loading diagrams to make sure the weight in your container is evenly distributed!


